Real-time notifications are crucial to any application (web or mobile) and Pusher is one of the most popular services which helps you deliver real-time notifications to your applications. I have used Pusher on several projects and it was a delight to implement. It is a simple and straightforward process. So let us see how we can implement real-time notifications in this Laravel pusher tutorial.
Prerequisites:
- Sign up for a new account on Pusher.com and obtain your
app\_id,key,secretand also note down yourcluster. These can be found in the App Keys section of your Pusher dashboard.
Setup your Laravel project:
-
See the official Laravel documentation for installation instructions on Laravel.
-
Require the
pusher-php-serverpackage in your Laravel project using the Composer.composer require pusher/pusher-php-server -
We will dump the composer autoload so our newly required package will be loaded by the Composer.
composer dumpautoload -
Create a
PusherControllerwhich will hold our notification logic. We will also add anotifyroute to our fileweb.php, using which we will send notification using Pusher.php artisan make:controller PusherController -
//web.php Route::get('/notify', 'PusherController@sendNotification'); -
Add the below code to
sendNotification()method ofPusherController.<?php namespace App\Http\Controllers; use Illuminate\Http\Request; use Pusher\Pusher; class PusherController extends Controller { public function sendNotification() { //Remember to change this with your cluster name. $options = array( 'cluster' => 'ap2', 'encrypted' => true ); //Remember to set your credentials below. $pusher = new Pusher( 'key', 'secret', 'app_id', $options ); $message= "Hello User"; //Send a message to notify channel with an event name of notify-event $pusher->trigger('notify', 'notify-event', $message); } } -
Here we first include Pusher (
use Pusher\\Pusher) in ourPusherControllerand set ourclusterandencryptionkeys in anoptionsarray. We then create a newPusherobject by providing our credentials and also passing in our$optionsarray. -
We can then publish to a channel and also specify a channel name. I have used
nofifyas thechannel nameandnotify-eventas theevent nameand these can be changed to any name you want. But remember to use the samechannel nameandevent namein your front-end client. -
Define a view route in your
web.phpfile. Thehome.blade.phpwill hold ourjscode and will display an alert whenever a new notification is published to our channel.Route::view('/home', 'home'); -
Add the code below to
home.blade.php.<html lang="en"> <head> <meta charset="utf-8"> <meta http-equiv="X-UA-Compatible" content="IE=edge"> <meta name="viewport" content="width=device-width, initial-scale=1"> <title>Real-time notifications in Laravel using Pusher</title> </head> <body> <h1>Real-time notifications in Laravel using Pusher</h1> <!-- Incldue Pusher Js Client via CDN --> <script src="https://js.pusher.com/4.2/pusher.min.js"></script> <!-- Alert whenever a new notification is pusher to our Pusher Channel --> <script> //Remember to replace key and cluster with your credentials. var pusher = new Pusher('key', { cluster: 'ap2', encrypted: true }); //Also remember to change channel and event name if your's are different. var channel = pusher.subscribe('notify'); channel.bind('notify-event', function(message) { alert(message); }); </script> </body> </html> -
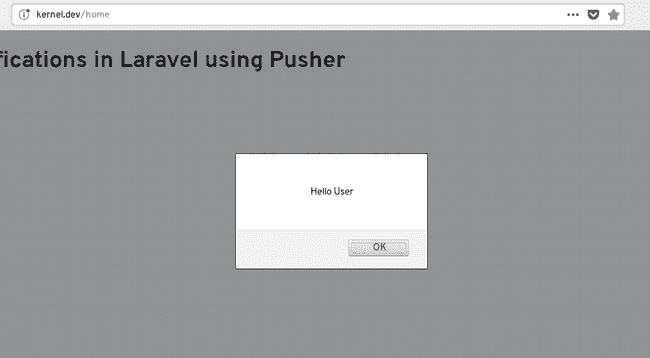
That’s it! open up a new tab and visit
www.your\_domain.dev/notifywhile having thewww.your\_domain.dev/homeopen in another tab and you should see the alert!.
Of course, this was just a basic demo and you may use this in a more practical setting such as a notification widget or something like that but the core concept will remain the same. The source code for this tutorial is available on GitHub.

