In the first part of this tutorial, we saw how to set up AWS EC2 instances so that they can communicate with each other. Now let’s see how we can finally set up Puppet Master and Agent on AWS EC2.
Install Puppet and Puppetmaster:
Make sure you are logged in as root while performing all of the below steps
sudo -i-
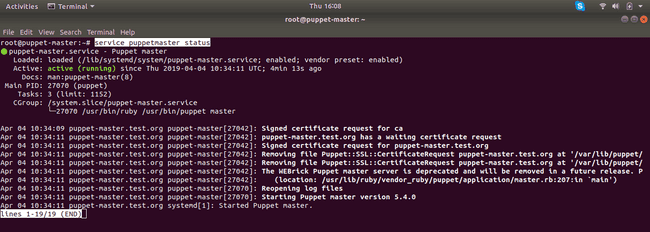
On Master Node: In this step, we are going to install
puppetmaster, and upon installation, thepuppetmasterservice is automatically started, and a certificate for the master is generated and signed. Note thatpuppetmasterpackage also installs the puppet agent on the master node (which is useful in case of a single node puppet installation), but as we are trying to set up a multi-node puppet installation we ignore the puppet agent that comes along withpuppetmaster. -
On Agent Nodes:
Authorize Agent Nodes:
-
On Both Agent Nodes:
-
On Master Node:
-
List all certificate requests that have been made to the puppet master.
puppet cert list -allThe output should display the list of agent requests:
-
Now sign both agent’s certificates one by one.
puppet cert sign puppet-agent-1.test.orgpuppet cert sign puppet-agent-2.test.org -
-
On Both Agent Nodes:
-
Enable the puppet agent and set the server.
puppet agent --enablepuppet agent --server puppet-master.test.org
-
Create Manifests File and Add Software Configuration:
What Is a Manifests File?
- The puppet manifests file is the actual file that contains the configuration details for the agents. This file is centrally stored at the Puppet Master.
- The Agents can “pull” new configurations or changes to existing configurations from Puppet Master. Note that Puppet (and Chef) use “PULL” type implementation whereas automation tools like Ansible and SaltStack use “PUSH” type implementations.
We will be defining a simple configuration that defines installation of mysql-server on Agent nodes.
-
Create
environments/production/manifestsdirectory.mkdir -p /etc/puppet/code/environments/production/manifests/ -
cdinto it and create a site.pp file (site.pp is the default manifest file)cd /etc/puppet/code/environments/production/manifests/ vim site.pp -
Define the configuration for mysql-server:
node 'puppet-agent-1.test.org', 'puppet-agent-2.test.org' { package { 'mysql-server': name => 'mysql-server', ensure => installed, } }- node ‘node_name’ specifies the target agent nodes to which the configuration applies to.
- package defines a software package to be installed and also it’s attributes.
-
Validate the site.pp and check for any syntax errors.
puppet parser validate site.ppThe command should run successfully without any errors.
Run Puppet Agent and Apply the Configuration:
-
On Both Agent Nodes:
-
Check if
mysqlis installed:mysqlThe output should be something like:
-bash: /usr/bin/mysql: No such file or directory
This is expected as we have not yet applied the configuration on agent nodes.
-
Fetch and apply configuration from Master:
puppet agent --testThe output should show that the configuration was applied and
mysql-serverpackage was installed. -
You can confirm that
mysql-serverwas installed by running the commandmysql:mysqlNow it should take you into the mysql terminal!.
-
Automate the Fetch and Apply Process:
It is tedious to run puppet agent --test on all your agent nodes and defeats the purpose of using a configuration management tool like Puppet in the first place. So let’s fix this by making our puppet agents periodically pull the newer configurations and updates.
-
Edit
/etc/puppet/puppet.confand addruninterval = 2mto the[main]section. This makes the agents fetch the changes every two minutes.vim /etc/puppet/puppet.conf
That’s it! the agents should now be able to fetch and apply the changes automatically.
While this tutorial shows you how to install and configure Puppet Master and Agent on AWS EC2, it does not give in-depth information on how Puppet works behind the scenes. If you are interested in learning Puppet, check out this excellent YouTube video on Puppet by edureka.
Thank you for following along in this tutorial series. Please ask any questions or doubts you might have in the comment section below.
![Set up Puppet Master and Agent on AWS EC2 [Part 2]](/static/7d06f42d2588a7746025306b0d78b589/12eee/puppet-on-aws-part-2.webp)


