Summernote is a WYSIWYG (What You See Is What You Get) style editor that offers lots of nifty features such as pasting images from clipboard, interactive text editing, easy server integration and it has all the features for standard HTML formatting.
I recently had to use summernote in a Laravel based project at work, and I must say it was a breeze to set up and get running. Also, the Summernote project is very active and has over 6000 stars on GitHub which makes me happy as it means better future maintainability and support. Now let me show you how you can implement Summernote with Laravel.
Set up Routes:
-
We define routes for displaying the Summernote form, storing the summernote content, and finally to display the content by fetching it from the database.
<?php
//summernote form
Route::view('/summernote','summernote');
//summernote store route
Route::post('/summernote','SummernoteController@store')->name('summernotePersist');
//summernote display route
Route::get('/summernote_display','SummernoteController@show')->name('summernoteDispay');
Note that the
Route::viewmethod is new in Laravel 5.5 and if you are using an older version then you can use a traditionalRoute::getand return the view in a method callback.
Summernote Input Form:
-
Create a
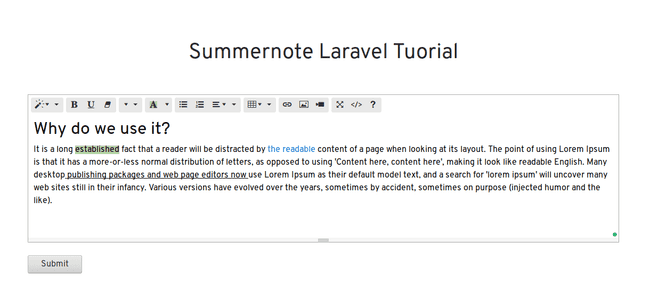
summernote.blade.phpand add the form which is going to display our summernote input.<form action="{{route('summernotePersist')}}" method="POST"> {{ csrf_field() }} <textarea name="summernoteInput" class="summernote"></textarea> <br> <button type="submit">Submit</button> </form> -
We will include summernote related assets and initialize summernote on our
textareainput which has a class ofsummernoteondocument ready.<!-- include libraries(jQuery, bootstrap) --> <link href="http://netdna.bootstrapcdn.com/bootstrap/3.3.5/css/bootstrap.css" rel="stylesheet"> <script src="https://cdnjs.cloudflare.com/ajax/libs/jquery/3.2.1/jquery.js"></script> <script src="https://netdna.bootstrapcdn.com/bootstrap/3.3.5/js/bootstrap.js"></script> <!-- include summernote css/js--> <link href="http://cdnjs.cloudflare.com/ajax/libs/summernote/0.8.9/summernote.css" rel="stylesheet"> <script src="https://cdnjs.cloudflare.com/ajax/libs/summernote/0.8.9/summernote.js"></script> <script> $(document).ready(function() { $('.summernote').summernote(); }); </script> -
My Summernote view:
Parse and Store Summernote Content:
-
Generate a
modelalong with aresourceful controllerand amigrationfile.php artisan make:model Summernote -rcm -
Add a
longTextcontent field to the summernote migration so that it can suffice for a decent length of content.public function up() { Schema::create('summernotes', function (Blueprint $table) { $table->increments('id'); $table->longText('content'); $table->timestamps(); }); } -
Don’t forget to generate summernote table from the
migrationfile.php artisan migrate -
Now we will parse our
summernoteInputin the store method ofSummernoteController.public function store(Request $request) { $detail=$request->summernoteInput; $dom = new \domdocument(); $dom->loadHtml($detail, LIBXML_HTML_NOIMPLIED | LIBXML_HTML_NODEFDTD); $images = $dom->getelementsbytagname('img'); //loop over img elements, decode their base64 src and save them to public folder, //and then replace base64 src with stored image URL. foreach($images as $k => $img){ $data = $img->getattribute('src'); list($type, $data) = explode(';', $data); list(, $data) = explode(',', $data); $data = base64_decode($data); $image_name= time().$k.'.png'; $path = public_path() .'/'. $image_name; file_put_contents($path, $data); $img->removeattribute('src'); $img->setattribute('src', $image_name); } $detail = $dom->savehtml(); $summernote = new Summernote; $summernote->content = $detail; $summernote->save(); return view('summernote_display',compact('summernote')); } -
We use
domdocument()method to generate a native PHP dom object which makes it easier to navigate HTML in a logical manner. -
Also, the Summernote
encodesany images in the content tobase64format which means easy transfer from client to server but is not feasible if you intend to store the content in a database. As even a small image encoded inbase64format could add tens of thousands of characters to the content. -
We work around this by
decodingthebase64format image (usingbase64\_decode()) and save it into thepublicdirectory. We then replace thesrcattribute of the image in the content with the link to the image we just stored. -
We finally store the content in
DBand return a view to display the content.
Fetch and Display Content from The View:
-
In
summernote_display.blade.phpadd the following code to display the content.<div class="container"> {!! $summernote->content !!} </div> -
Yeah, a single
{!! $summernote->content !!}is enough!. Note that we use{!! !!}and not{{ }}as the latter escapes the string which we do not want in this case. -
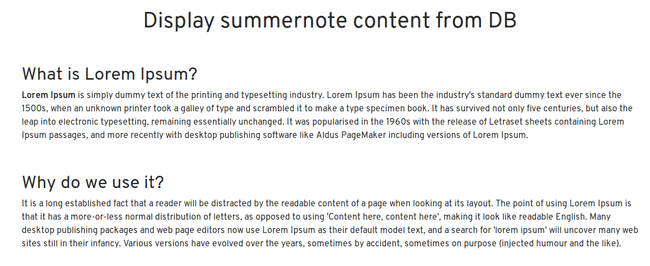
This is how mine looks like:
Updating Summernote Content:
If you need to show an edit form for Summernote content. Wherein you may want to fetch the content stored in a database and load it into Summernote.
You Can Do:
$(document).ready(function() {
    //initialize summernote
    $('.summernote').summernote();
    //assign the variable passed from controller to a JavaScript variable.
    var content = {!! json_encode($summernote->content) !!};
    //set the content to summernote using `code` attribute.
    $('.summernote').summernote('code', content);
});
That’s it, and it’s that easy to use Summernote with Laravel!. It’s mostly straightforward except for the image conversion part. I hope you found this article helpful and I would be happy to hear your thoughts and opinions in the comments below.
The source code of the project is available in my GitHub repository.


