This tutorial is the first of the two-part tutorial series which provides step by step instructions on how to set up Puppet Master and Agent on AWS EC2 instances. We are going to use two of the popular technologies in this tutorial which can be used to deploy and run applications on the cloud.
Introduction:
- Puppet: is an open-source software configuration management tool that follows a master-slave architecture. Puppet supports both Windows and Unix-like operating systems and also provides its declarative language to define the software configuration.
- AWS: stands for Amazon Web Services, and is a fully-featured cloud computing platform provided by Amazon. Its services include (but are not limited to) Compute, Storage, Network, Analytics and so on. We make use of AWS’ EC2 instances which is part of the compute service provided by AWS.
In this first part, we are going to see how to set up EC2 instances in AWS and make sure these instances can communicate with each other.
Create EC2 instances:
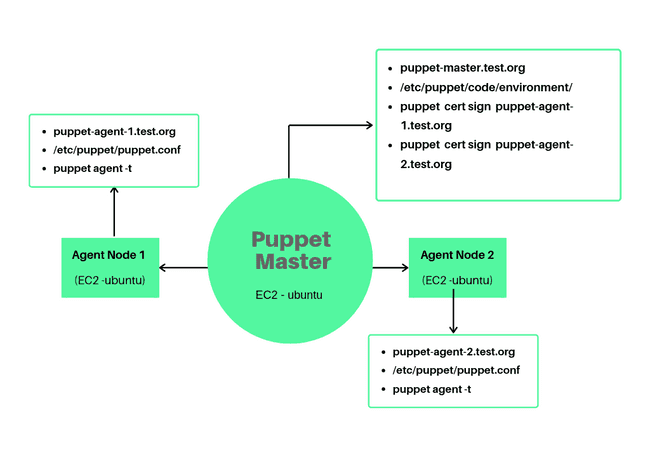
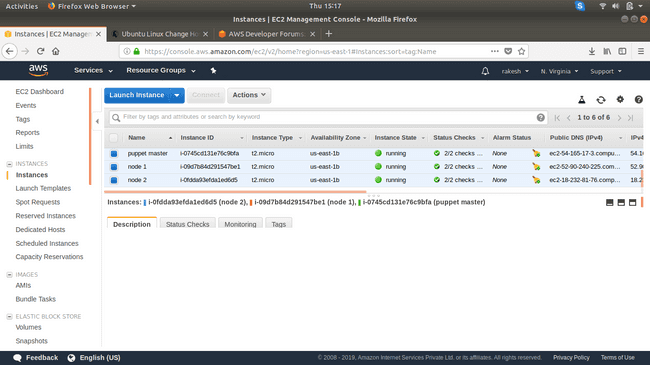
We make use of 3 EC2 instances, 1 of them is going to be our Puppet Server (Master node), and the remaining two nodes are our agents (Agent nodes). The idea here is that the Puppet master should be able to deploy the software configuration on authorized agent nodes.
-
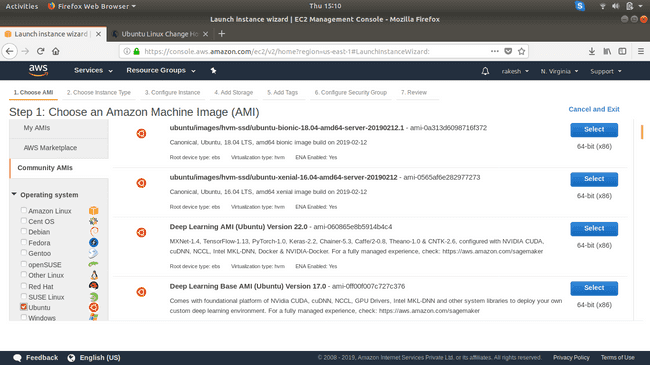
Choose ubuntu-bionic-18.04 AMI.
-
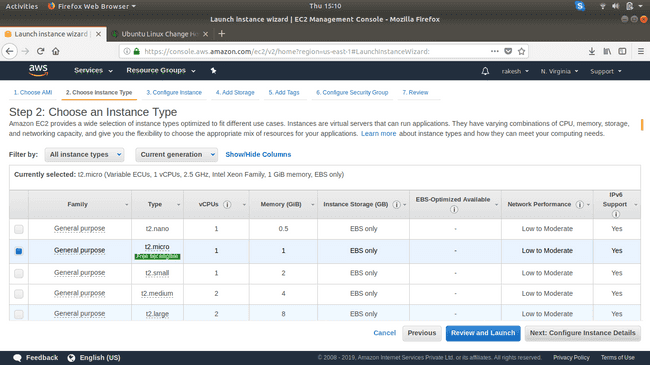
Select the instance type.
-
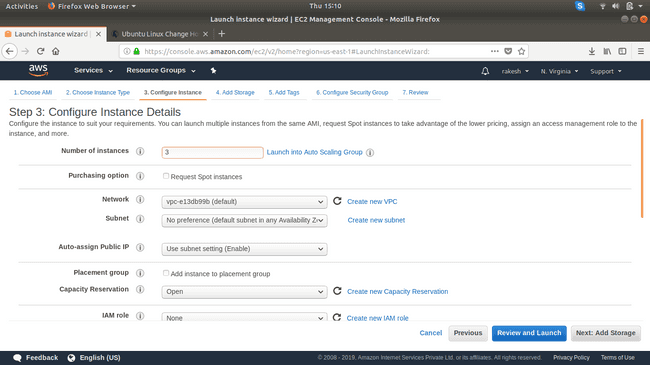
Configure instance details:
-
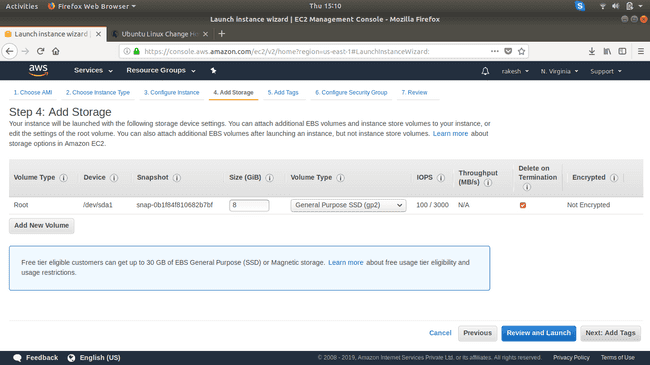
Add storage.
-
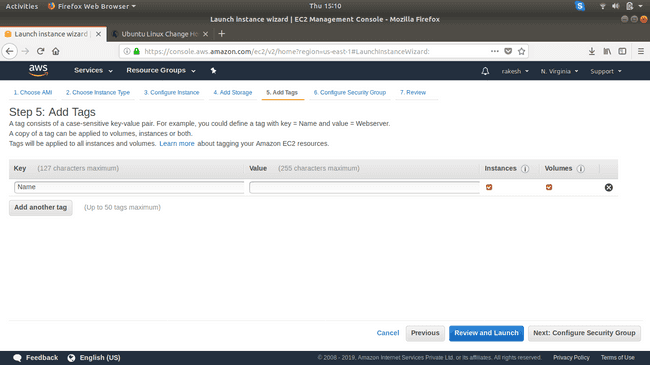
Add a Name tag.
-
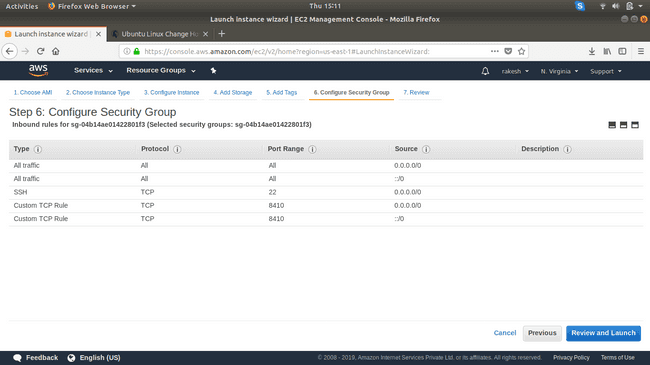
Configure Security Group: Make sure you allow traffic of type:
-
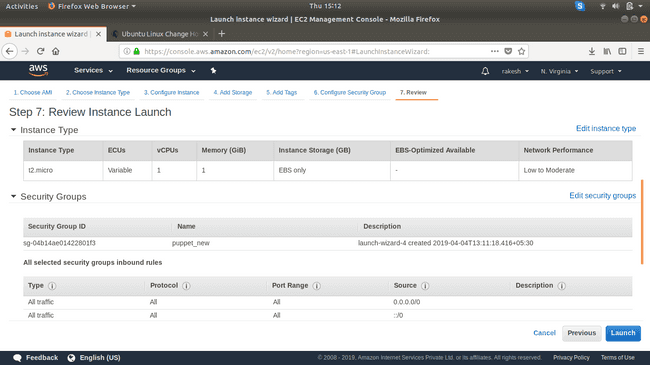
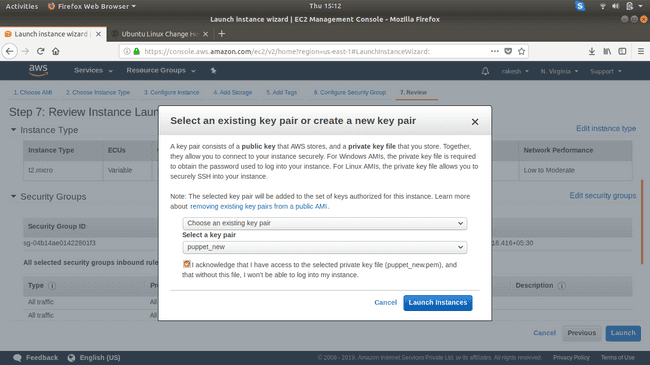
Confirm the configuration and click Launch.
-
Create a new key-pair; make sure you download and save that key-pair in a safe location.
-
The instances should be up and running in a few minutes. Edit the Name tag for each node and set its name (master, node1, and node2)
Set up Communication Between Instances:
-
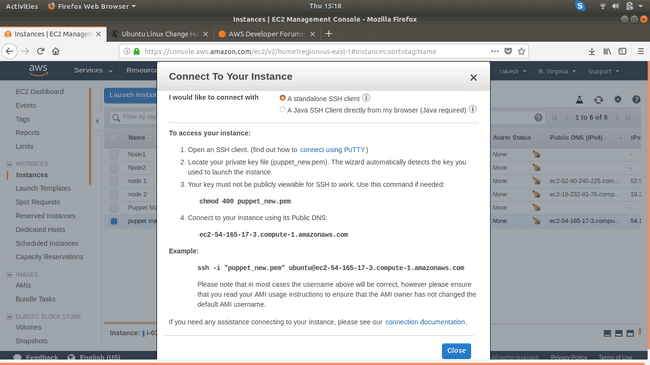
SSH into the instance (If you are on Windows use Putty):
-
Set up hostname: Puppet nodes communicate with Puppet Master using the FQDN (Fully Qualified Domain Name). So we need to set the hostname to an FQDN that is easy to remember.
-
On the Master Node:
-
Log in as root:
sudo -i -
Set hostname:
hostnamectl set-hostname puppet-master.test.org -
Exit and login as root again so that the changes get reflected.
exit
sudo -i
-
-
On Agent Node 1:
-
Log in as root:
sudo -i -
Set hostname:
hostnamectl set-hostname puppet-agent-1.test.org -
Exit and login as root again so that the changes get reflected.
exit
sudo -i
-
-
On Agent Node 2:
-
Log in as root:
sudo -i -
Set hostname:
hostnamectl set-hostname puppet-agent-2.test.org -
Exit and login as root again so that the changes get reflected.
exit
sudo -i
-
-
Update all three instances:
apt update && apt upgrade -y -
Add entries to the hosts file: In this step, we are adding IP and hostname entries to the
/etc/hostsfile so that the Master node can know the IP addresses of the Agent nodes and similarly the Agent nodes can know the IP address of Master node.-
Get Private IP – Hostname string from both Agent nodes and copy it somewhere. The command to generate the Private IP-Hostname string is
echo `hostname -I` `hostname`Make sure you run the above command in both Agent nodes and copy the result somewhere. We are going to need them in the next step.
-
On Master Node: Run the below commands to add the agent hostname entries to the hosts file.
echo 172.32.31.33 puppet-agent-1.test.org >> /etc/hosts
echo 172.32.38.21 puppet-agent-2.test.org >> /etc/hosts
Make sure you use your Private IP – Hostname string and don’t just copy-paste the command from above.
-
If you
catthe/etc/hostsfile on Master node it should look something like this: -
Now try to ping both Agent nodes from Master, If all went well it should work.
ping -c 5 puppet-agent-1.test.org
ping -c 5 puppet-agent-2.test.org
The output should look something like this:
-
Now we need to add the Master hostname entry to both of our agent nodes.
-
Get Private IP – Hostname string of Master Node and copy it in a safe place.
echo `hostname -I` `hostname` -
On both of the Agent nodes, add the hostname entry.
echo 172.32.31.33 puppet-master.test.org >> /etc/hosts -
The
/etc/hostsfile should look something like this on both Agent nodes: -
Now try to ping Master node from both Agent nodes, and it should work.
-
-
-
Well done!, we’ve now successfully set up our 3 EC2 instances which can communicate with each other. I’ve tried to add as much detail as possible here but if you still have any doubts or are stuck anywhere don’t hesitate to leave a comment!.
Now we let us move on to the next part of this tutorial which covers Puppet Master and Agent on AWS installation and configuration.
![Set up Puppet Master and Agent on AWS EC2 [Part 1]](/static/41677902a42e2c9eeb5e58eae2935d5f/12eee/puppet-on-aws-part-1.webp)
